Vintage Embroidery Designs - A Great Example
Vintage Embroidery Designs
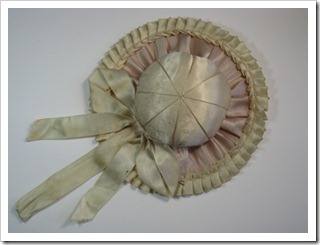
Antique Bonnet Pin Cushion
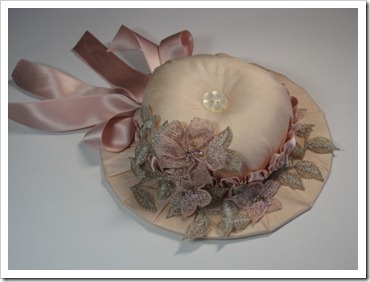
This picture is my rendition of the antique pin cushion shown below.
I often buy things that other people wouldn't touch because of their condition. This one is drab and dirty but I thought the design was well worth saving. I prefer a softer look so I left off the trim around the brim and flattened out the crown a little. I hope you enjoy making one for yourself.
- Cut a 6 1/2" dia. circle of cardboard and a piece of Wonder Under.
- Iron Wonder Under to one side of cardboard circle and remove paper.
- Cut a 13" dia. circle of fabric (I used silk shantung.)
- With Wonder Under side of cardboard up, center fabric and iron it to the cardboard.
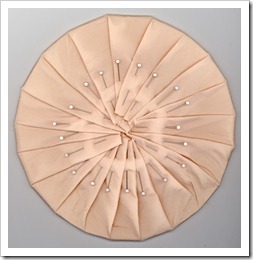
- Turn over and hand pleat the fabric to the other side, pinning as you go. It should look like this photo. Baste fabric to hold near the center of the circle.
Hat Crown
- Cut a 3 1/2" dia. circle of cardboard and put a 1 1/2" dia. hole within it (this will be where the stuffing for your pin cushion goes in.)
- Cut a 7" dia. circle of fabric that matches your brim and a 7" dia. circle of fabric to use as a liner (I used muslin.)
- Place the two fabric circles together and run a gathering stitch 1/4" in all the way around the edge. I did this by hand, but machine stitching will do fine.
- Start gathering this edge up and as it forms a pocket, place the cardboard with the hole inside.
- Continue to gather until the 1/4" edge of the fabric will go around the edge
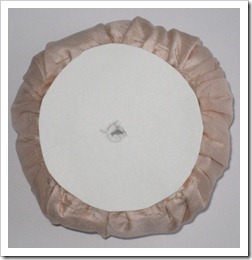 of the cardboard circle. Glue this edge down to the cardboard and set aside to dry. Stuff firmly through the 1 1/2" hole. (Use wool roving when you start filling as it is better for the life of your pins and needles and fill in the bottom with Polyfil to save on expense.) Put a small hole in another 3 1/2" dia. cardboard circle and glue this to the bottom and allow to dry thoroughly. It should look like this photo when finished.
Tufting: Thread a button through one hole and leave a long tail. Using a doll making needle, go up through the hole in the cardboard and through the center of the stuffed crown. Use a very strong thread for this (I used dental floss.) Rethread into a needle that will go through your button and rethread to the doll making needle again to go back down through the other hole in the button you started with. Do this one or two more times for strength. At the bottom, tie the tail you left earlier with the end of your thread, pull tightly and tie a firm knot.
Assembly: Center and 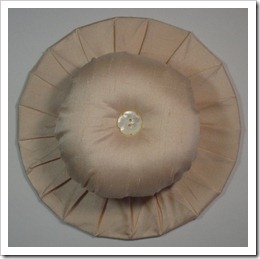 glue the crown to the pleated side of your brim and allow to dry. You can now slip stitch the crown to the brim around the edge. This photo shows how it will look before embellishment.
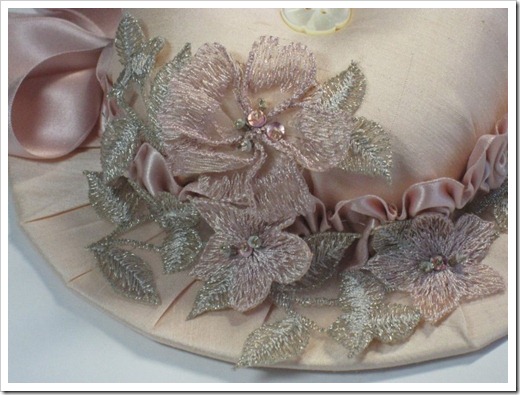
Finally, decorate your hat pin cushion as desired. Add lace, ribbon, flowers to make it truly your own. Because the bottom is flat, you can add a pretty cording or a ring to the back for hanging. Hang it in a special place and you'll always know where your pin cushion is.
Feather Fan
 titch leaving open the areas indicated on the pattern. Cut out your lined panels, clip curves to within a tiny fraction of the seam, turn and shape each panel while pressing. Proper pressing is important for this fan. Use the point of your iron and go carefully around the seamed edge and use a blunt point, such as a knitting needle, on the inside to smooth out the seam as you press.
Using the printed fan layout provided, start on the right side and line up one of panel #2. Pin the next panel #2 over the open edge. Pin on the final panels in this way putting panel #1 on last. Do not stitch the panels together until you finish with the fan bottom in case an adjustment in the span is needed.
Trace the fan bottom onto the back of your lining and place your lining and fabric right sides together. Stitch around the traced line. Cut out the lined bottom leaving 1/4" fabric allowance. Clip curves and make a slit in your lining just large enough to turn the bottom to the right side. Press carefully as you did with the panels. Lay this over the pinned panels and adjust the pieces to fit. Pin the bottom in place and appliqué stitch all pinned seams. Finish any embellishment now or after you have stitched the fan to your CQ project.
Note: You should think about the embellishment you want before you begin your fan. I had to iron the transfers onto my fabric before I cut out the panels.
Victorian Fan
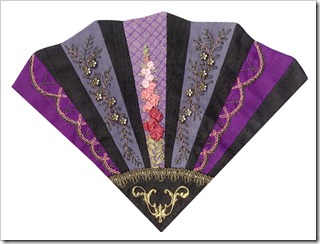 the muslin and you will stitch on the traced solid lines. Use a dark fabric on the narrow panels of the fan (I used black) and lighter fabric or fabrics on the wide panels. This fan will not be easily made using heavy or tricky fabrics such as velvet. Mine is made entirely of silk dupioni but other lightweight fabrics are fine. The outside dashes mark the seam allowance and the dashes down the wide panels in the fan mark the center for you to embellish. I personally think this fan looks more dimensional if you do not embellish the dark narrow panels.
After all embellishing is done, and with right sides together, use a lightweight fabric (I used silk organza) and stitch the top jagged edge of the fan along the dashes shown in the pattern. This stitch line has a 1/4" allowance. Carefully clip down into the V shapes along this edge, turn to the right side and using the point of your iron, press this seamed edge.
Cut the pattern for the bottom of the fan out of freezer paper. Iron it to the wrong side of your fabric and cut around the freezer paper leaving 1/4" of the fabric above the curved part of the freezer paper pattern. Clip along this part not quite to the freezer paper, press this edge over, remove the freezer paper and press again. Now appliqué stitch this along this same curve to the bottom of the fan and embellish.
This fan can go right into the corner of one of your squares or the 1/2" side seams can be pressed to the back and the entire fan can be appliquéd in any position desired.
Fun with Valentines
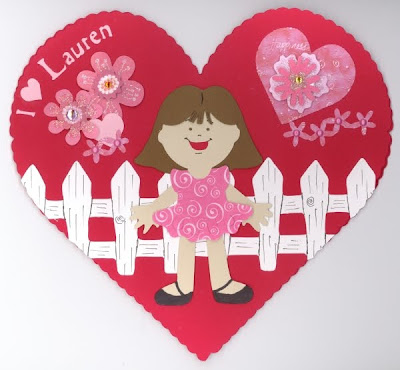
This first valentine is one I made for a CQMagOnline article in the current issue. Easy instructions are there as well.


